Android Snackbar的使用

Snackbar是design support library中的组件的其中之一,它的使用效果与Toast类似,但更加灵活
Snackbar拥有的特性:

  • 显示一段时间或当用户与之进行交互后,会自动消失
  • 通过CoordinatorLayout可以实现向右滑动消除Snackbar的效果
  • 同一时间只能显示一个Snackbar
  • 与Toast类似地使用LENGTH_LONG 和 LENGTH_SHORT设置显示时间
  • 提供Action属性供添加点击事件监听
  • 提供回调函数可以对Snackbar进行监听

想要使用Snackbar,首先需要添加com.android.support:design依赖项

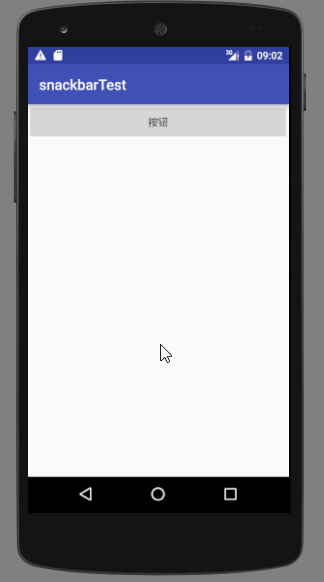
一、 Snackbar的最简单用法是和Toast一样声明

1
Snackbar.make(textView, "消息", Snackbar.LENGTH_SHORT).show();

大部分属性与Toast相同,不过第一个参数传入的不是Context,而应该是一个View,因为Snackbar需要一个控件容器用来容纳自身,这里使用一个TextView
所以,主布局文件可修改为

1
2
3
4
5
6
7
8
9
10
11
12
13
14
15
16
17
18
19
20
21
<?xml version="1.0" encoding="utf-8"?>
<LinearLayout xmlns:android="http://schemas.android.com/apk/res/android"
xmlns:tools="http://schemas.android.com/tools"
android:layout_width="match_parent"
android:layout_height="match_parent"
android:orientation="vertical"
tools:context="com.zy.snackbartest.MainActivity">

<TextView
android:id="@+id/text"
android:layout_width="match_parent"
android:layout_height="wrap_content"
android:gravity="center"
android:text="Snackbar" />

<Button
android:id="@+id/button"
android:layout_width="match_parent"
android:layout_height="wrap_content"
android:text="点击按钮" />
</LinearLayout>

MainActivity 修改为如下所示,当点击了Button后弹出Snackbar

1
2
3
4
5
6
7
8
9
10
11
12
13
14
15
16
17
18
19
20
21
22
public class MainActivity extends AppCompatActivity {

private TextView textView;

private Button button;

@Override
protected void onCreate(Bundle savedInstanceState) {
super.onCreate(savedInstanceState);
setContentView(R.layout.activity_main);

textView = (TextView) findViewById(R.id.text);
button = (Button) findViewById(R.id.button);

button.setOnClickListener(new View.OnClickListener() {
@Override
public void onClick(View v) {
Snackbar.make(textView, "消息", Snackbar.LENGTH_SHORT).show();
}
});
}
}

二、 此外,Snackbar可以通过Action来与之进行交互

1
2
3
4
5
6
7
8
9
10
11
12
13
14
button.setOnClickListener(new View.OnClickListener() {
@Override
public void onClick(View v) {
Snackbar.make(textView, "消息", Snackbar.LENGTH_SHORT)
.setAction("Action", new View.OnClickListener() {
@Override
public void onClick(View v) {
Toast.makeText(MainActivity.this, "点击了Action", Toast.LENGTH_SHORT).show();
}
})
.setActionTextColor(Color.parseColor("#375ED1"))
.show();
}
});

三、 官方推荐使用CoordinatorLayout作为Snackbar的容纳容器,这样就可以实现向右滑动消除Snackbar的效果

将主布局文件修改为

1
2
3
4
5
6
7
8
9
10
11
12
13
14
15
16
17
18
19
20
21
<?xml version="1.0" encoding="utf-8"?>
<LinearLayout xmlns:android="http://schemas.android.com/apk/res/android"
xmlns:tools="http://schemas.android.com/tools"
android:layout_width="match_parent"
android:layout_height="match_parent"
android:orientation="vertical"
tools:context="com.zy.snackbartest.MainActivity">

<android.support.design.widget.CoordinatorLayout
android:id="@+id/layoutRoot"
android:layout_width="match_parent"
android:layout_height="match_parent">

<Button
android:id="@+id/button"
android:layout_width="match_parent"
android:layout_height="wrap_content"
android:text="按钮" />

</android.support.design.widget.CoordinatorLayout>
</LinearLayout>

MainActivity 文件修改为

1
2
3
4
5
6
7
8
9
10
11
12
13
14
15
16
17
18
19
20
21
22
23
24
25
26
27
28
29
30
public class MainActivity extends AppCompatActivity {

private CoordinatorLayout layout;

private Button button;

@Override
protected void onCreate(Bundle savedInstanceState) {
super.onCreate(savedInstanceState);
setContentView(R.layout.activity_main);

layout = (CoordinatorLayout) findViewById(R.id.layoutRoot);
button = (Button) findViewById(R.id.button);

button.setOnClickListener(new View.OnClickListener() {
@Override
public void onClick(View v) {
Snackbar.make(layout, "消息", Snackbar.LENGTH_SHORT)
.setAction("Action", new View.OnClickListener() {
@Override
public void onClick(View v) {
Toast.makeText(MainActivity.this, "点击了Action", Toast.LENGTH_SHORT).show();
}
})
.setActionTextColor(Color.parseColor("#375ED1"))
.show();
}
});
}
}

这里写图片描述

四、 可以设置Snackbar的出现消失监听函数

在Snackbar出现和消失时分别弹出一个Toast进行提示

1
2
3
4
5
6
7
8
9
10
11
12
13
14
15
16
17
18
19
20
21
22
23
24
25
26
27
button.setOnClickListener(new View.OnClickListener() {
@Override
public void onClick(View v) {
Snackbar.make(layout, "消息", Snackbar.LENGTH_SHORT)
.setAction("Action", new View.OnClickListener() {
@Override
public void onClick(View v) {
Toast.makeText(MainActivity.this, "点击了Action", Toast.LENGTH_SHORT).show();
}
})
.setActionTextColor(Color.parseColor("#375ED1"))
.setCallback(new Snackbar.Callback() {
@Override
public void onDismissed(Snackbar snackbar, int event) {
super.onDismissed(snackbar, event);
Toast.makeText(MainActivity.this, "消失了", Toast.LENGTH_SHORT).show();
}

@Override
public void onShown(Snackbar snackbar) {
super.onShown(snackbar);
Toast.makeText(MainActivity.this, "出现了", Toast.LENGTH_SHORT).show();
}
})
.show();
}
});

五、改变Snackbar的背景色

想要设置Snackbar的背景色,就要通过getView()方法了,这里Snackbar需要换一种声明方式

1
2
3
4
5
6
7
8
9
button.setOnClickListener(new View.OnClickListener() {
@Override
public void onClick(View v) {
Snackbar snackbar = Snackbar.make(layout, "消息", Snackbar.LENGTH_SHORT);
//设置背景色
snackbar.getView().setBackgroundColor(Color.parseColor("#375ED1"));
snackbar.show();
}
});

六、Snackbar不一定只能从屏幕底端出现

Snackbar会沿着View 的树状路径,找到第一个合适的布局或窗口视图,作为父 View
因此,我们可以改变Snackbar的父View位置,从而改变Snackbar的出现位置
修改主布局文件,将屏幕平均分为上下两个空间

1
2
3
4
5
6
7
8
9
10
11
12
13
14
15
16
17
18
19
20
21
22
23
24
25
26
27
28
29
30
31
<?xml version="1.0" encoding="utf-8"?>
<LinearLayout xmlns:android="http://schemas.android.com/apk/res/android"
xmlns:tools="http://schemas.android.com/tools"
android:layout_width="match_parent"
android:layout_height="match_parent"
android:orientation="vertical"
tools:context="com.zy.snackbartest.MainActivity">


<android.support.design.widget.CoordinatorLayout
android:id="@+id/layoutRoot"
android:layout_width="match_parent"
android:layout_height="0dp"
android:layout_weight="1">

<Button
android:id="@+id/button"
android:layout_width="match_parent"
android:layout_height="wrap_content"
android:text="按钮" />

</android.support.design.widget.CoordinatorLayout>

<FrameLayout
android:layout_width="match_parent"
android:layout_height="0dp"
android:layout_weight="1"
android:background="#adc">

</FrameLayout>
</LinearLayout>
坚持原创技术分享,您的支持将鼓励我继续创作!